


How to Fit ISOFIX Car Seat Properly
How to Fit ISOFIX Car Seat Properly
The first time you try to install a car seat, it can feel less like a quick errand and more like a practical exam you did not revise for. If you are wondering how to fit ISOFIX car seat models correctly, the good news is that the system is designed to make installation more secure and more consistent than a standard seat belt fitting - but only when every step is done properly.
ISOFIX is widely chosen by parents because it reduces the chance of user error. That matters, especially in the newborn months when you are juggling school runs, feeds, changing bags and very little sleep. Still, even a premium car seat will only perform as intended if it is fitted exactly as the manufacturer recommends.
What ISOFIX actually means
ISOFIX is a built-in anchorage system found in many cars and compatible car seats. Instead of holding the seat in place with the adult seat belt alone, the car seat or base clicks directly onto metal anchor points built into the vehicle. Those anchor points are usually tucked between the vehicle seat back and seat cushion.
Depending on the car seat, the installation is then stabilised either with a support leg that rests on the car floor or a top tether strap that attaches behind the vehicle seat. Some seats use one method, some the other, and some infant carriers work with a separate ISOFIX base.
The appeal is easy to see. ISOFIX can offer a firmer fit, clear installation indicators and less movement when correctly installed. That said, not every ISOFIX seat fits every car, and not every vehicle position is suitable. Compatibility always comes first.
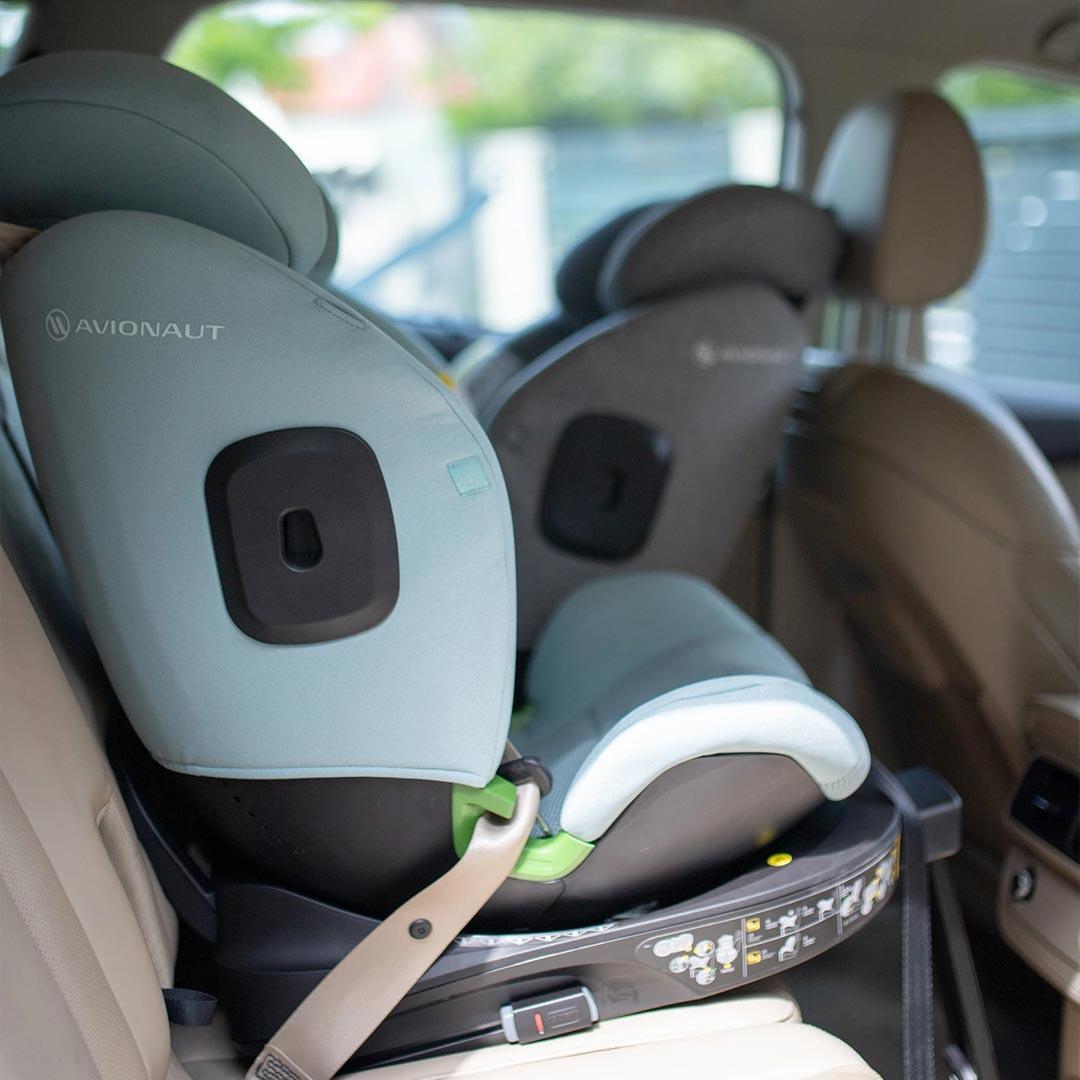
Before you fit an ISOFIX car seat
Before you fit an ISOFIX car seat, check three things: your car handbook, the car seat manual and the approval label on the seat. It sounds obvious, but this is where most confusion starts. Your vehicle handbook will tell you which seats have ISOFIX anchor points and whether there are any restrictions.
This is particularly important if your car has underfloor storage compartments, unusual seat shapes or fixed headrests, as these can affect support legs and top tethers. Your car seat manual will show the exact fitting route for that model. Even among premium brands, the process is not identical. Some seats extend onto the anchor points and click in directly.
Others sit on a base first. Some rotate, which can make daily use easier, but the fitting process still has to be done precisely. It is also worth checking whether your seat is i-Size or R129 approved and whether your vehicle seat position is compatible. A seat that is beautifully designed and highly rated still needs to match your specific car.
How to fit ISOFIX car seat models step by step
Start by locating the ISOFIX anchor points in your vehicle. These are small metal bars built into the seat, usually marked with a fabric tag or plastic guide. In some cars they are easy to spot. In others you may need to gently feel between the seat back and base. If your car seat comes with plastic insertion guides, slide them onto the anchor points first. They are not always essential, but they can make it easier to line the connectors up without damaging the seat fabric.
Next, extend the ISOFIX connectors on the car seat or base. Position the seat so the connectors line up evenly with both anchor points. Push firmly until each side clicks into place. Most modern models have visual indicators, often red turning to green, to show when the connection is secure. Once both connectors are engaged, push the base or seat back towards the vehicle seat until it sits snugly.
There should not be a large gap unless the manufacturer specifically states otherwise. Then check the secondary restraint. If your seat uses a support leg, lower it until it rests firmly on the car floor.
The leg should be straight, stable and showing the correct indicator. It must not hover above the floor or press down so hard that it lifts the base. If your car has underfloor storage, check the handbook carefully before using a support leg over that area. If your seat uses a top tether instead, route the strap exactly as instructed and attach it to the designated tether point in the vehicle. Then tighten it until the slack is removed.
Do not guess the route - top tether positions vary between cars. Finally, test the fit. Grip the seat or base at the belt path or ISOFIX connection area and try to move it side to side and front to back. A properly fitted ISOFIX seat should feel secure, with only minimal movement.

Fitting an infant carrier with an ISOFIX base
For many parents, the first experience of ISOFIX is with an infant carrier and separate base. In practical terms, this is often the easiest option for everyday travel because the base stays installed in the car and the carrier clicks in and out.
The base is fitted first using the ISOFIX anchor points and, in most cases, a support leg. Once the base is secure and all indicators show correctly, the infant carrier clicks onto the base.
You should hear or feel the seat lock into position, and most designs include another set of indicators for reassurance. This setup is convenient, but it does not remove the need for regular checks. It is still worth making sure the base has not loosened over time, especially if different drivers use the car or the seat is moved between vehicles.
Common fitting mistakes to avoid
The most common mistake is assuming a click means everything is done. In reality, many seats have more than one confirmation point. Both ISOFIX connectors need to be locked, and the support leg or top tether needs to be set correctly too.
Another issue is fitting the seat in a compatible-looking position rather than a genuinely approved one. Not all rear seats in all cars can take every ISOFIX model. Middle rear seats, in particular, vary a lot. Loose support legs are another frequent problem.
A leg that is not touching the floor properly will not stabilise the seat. Just as problematic is a support leg placed on an unsuitable storage compartment lid. Parents also sometimes add accessories that did not come with the seat, such as seat protectors, extra padding or head supports. These can interfere with the fit and may not have been safety tested with your model.
When ISOFIX is not always the right answer
ISOFIX is a strong choice, but it is not automatically the best option in every scenario. Some car seats can be installed very securely with a seat belt and may offer more flexibility if you regularly swap cars, use taxis or travel with grandparents.
There are also situations where a seat belt-installed model is more practical, particularly for older child seats or in cars without accessible ISOFIX points. The best setup depends on your car, your routine and the age and stage of your child.
That is why many parents prefer to shop by use case rather than by one feature alone. If you are comparing travel options, it helps to think about the whole picture - daily nursery drop-offs, boot space, compact cars, rotating seats, travel systems and how often the seat will be moved.

Signs your ISOFIX car seat is fitted correctly
A correctly installed seat should click into the anchor points with clear confirmation, sit firmly against the vehicle seat where required, and show green indicators on every relevant part of the system.
The support leg should rest solidly on the floor or the top tether should be tight and correctly attached. The seat should not wobble excessively when tested at the base. If it feels loose, uneven or unstable, remove it and start again. It is always better to refit than to hope for the best.
If your child is already using the seat, check the harness separately after installation. A perfectly fitted ISOFIX base does not make up for loose straps, bulky coats or an incorrectly adjusted headrest.
A few final checks before every journey
Once the seat is installed, build in a quick habit check. Look at the installation indicators, make sure the support leg is still correctly positioned and confirm nothing has shifted after loading shopping, a pushchair or overnight bags into the car.
If you are buying a new seat, choosing from a trusted specialist such as Natural Baby Shower can make the process feel far less overwhelming, particularly when you are balancing safety, style and long-term value. The right car seat should fit your child, your car and your real life. Confidence usually comes after the second or third time you fit it, not the first - and that is completely normal.


